Setting up Salesforce Email to Case is a transformative step for any organization looking to enhance its customer support system. By converting incoming emails into cases automatically, businesses can streamline their support processes, ensuring that no customer query falls through the cracks. This guide provides a comprehensive walkthrough of the setup process, along with insights into advanced configurations and best practices.
What is Salesforce Email to Case?
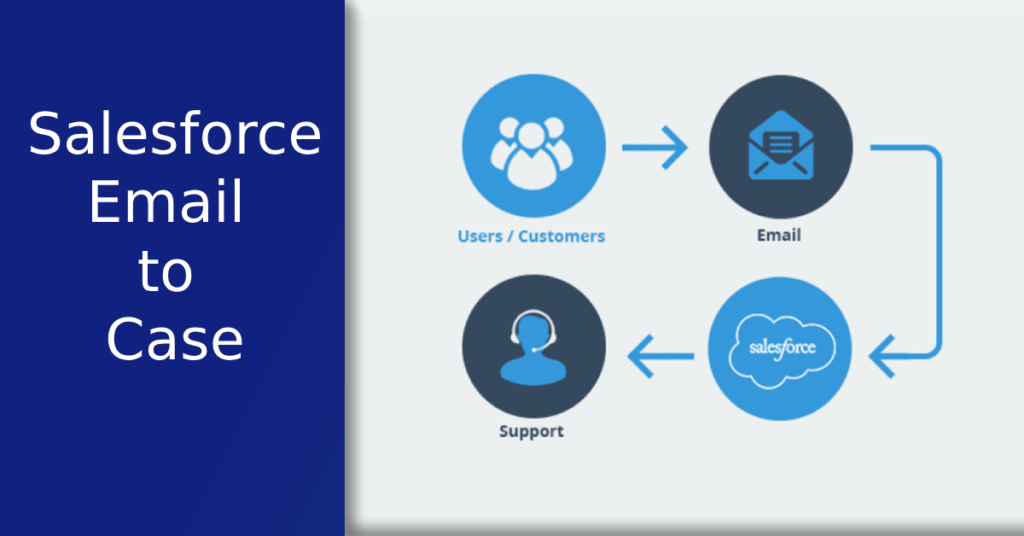
Salesforce Email to Case is a feature that automatically converts customer emails into support cases. This integration helps in managing customer queries efficiently by organizing them within Salesforce. The automation reduces manual intervention, ensuring that every email is tracked and responded to promptly, thus improving customer satisfaction and support team productivity.
Benefits of Using Salesforce Email to Case
Utilizing Salesforce Email to Case offers several advantages:
- Efficiency: Automates the creation of cases from emails, reducing manual entry and errors.
- Centralization: Consolidates all customer interactions into a single platform for easier management.
- Speed: Enhances response times by immediately capturing and routing customer emails to the appropriate teams.
- Tracking: Provides comprehensive tracking and reporting tools to monitor case resolution and team performance.
- Customization: Allows for tailored configurations to meet specific business needs.
How Email to Case Works in Salesforce
When an email is sent to a designated support address, Salesforce processes the email and creates a new case based on predefined rules. The system extracts relevant information from the email, such as the sender’s address, subject, body, and any attachments, and uses this data to populate the case fields. This seamless integration ensures that support teams can efficiently manage and resolve customer issues within the Salesforce environment.
Prerequisites for Setting Up Email to Case
Before configuring Salesforce Email to Case, ensure your Salesforce instance and email systems are appropriately set up. This section outlines the necessary prerequisites.
Required Salesforce Editions
Salesforce Email to Case is available in various editions, including Professional, Enterprise, Performance, Unlimited, and Developer. Ensure your organization’s Salesforce edition supports Email to Case functionality before proceeding with the setup.
Necessary Permissions and Access Rights
To configure Email to Case, you need administrative privileges in Salesforce. Additionally, the user setting up the feature must have permissions related to case management and email services. These permissions ensure the user can access and modify the necessary settings and configurations.
Email Account Configuration
A dedicated email account is required to receive customer emails. This account should be configured with IMAP or POP settings enabled, allowing Salesforce to retrieve incoming emails. Using a generic support address (e.g., support@yourcompany.com) is recommended to centralize customer queries.
Salesforce Email to Case Setup Guide
Setting up Salesforce Email to Case involves several steps. This guide will walk you through the process to ensure a smooth and effective configuration.
Configuring Salesforce Email to Case Settings
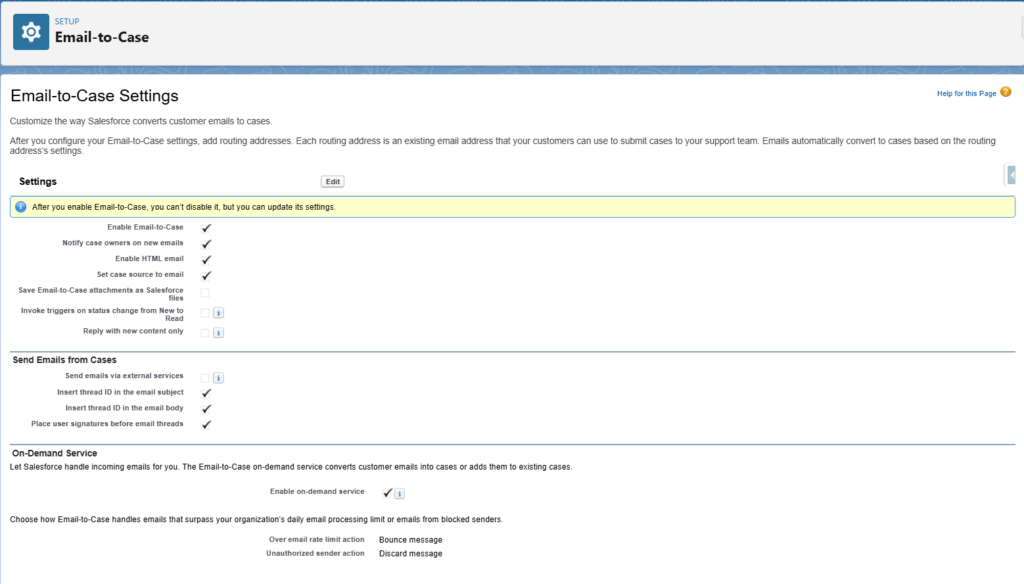
Begin by navigating to the Email-to-Case settings in Salesforce:
- Go to Setup.
- Under Service Setup, search for Email-to-Case.
- Enable the Email-to-Case checkbox to activate the feature.
Creating and Customizing Email Services
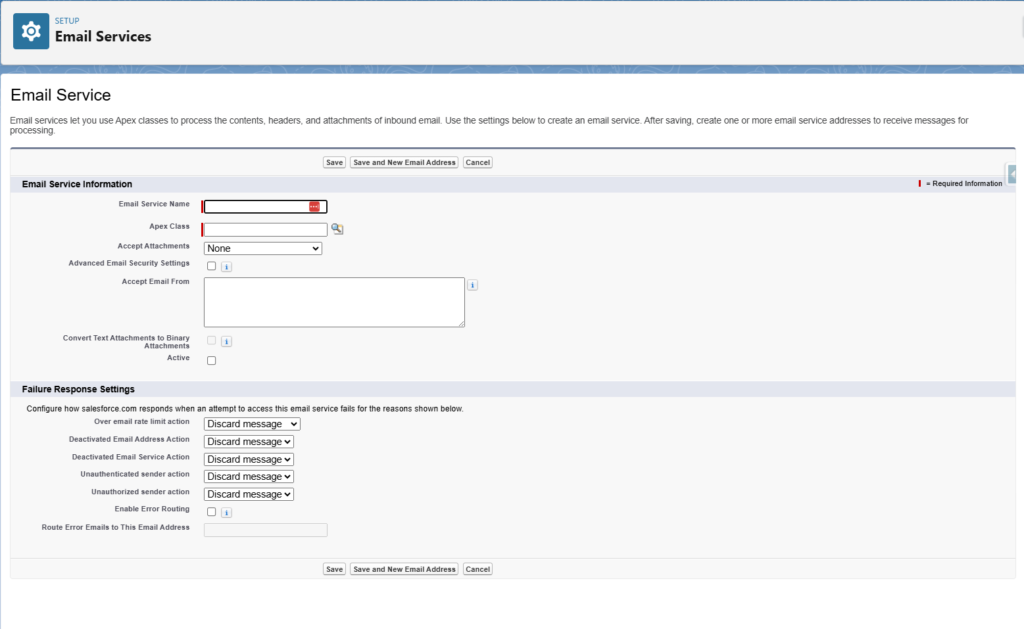
Next, create an email service that defines how incoming emails are processed:
- Go to Setup, search for Email Services, and click New Email Service.
- Provide a name for the service and select an appropriate Apex class to handle the email processing.
- Save the service, then click on New Email Address to generate an address for this service.
Generating the Email Service Address
The email service address is where customer emails will be sent:
- After creating the email service, generate a unique email address.
- Salesforce provides an address in the format @yourdomain.salesforce.com.
- Configure your email server to forward emails from your support address to this Salesforce-generated address.
Setting Up Routing Addresses
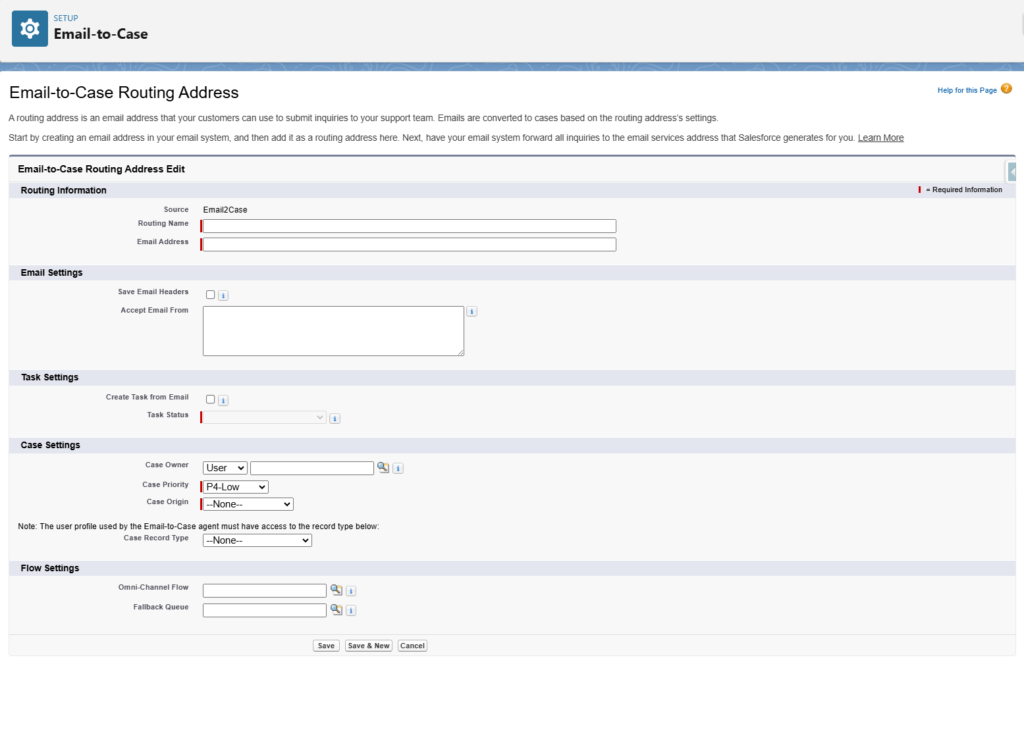
Ensure emails sent to your support address are forwarded correctly:
- Configure the forwarding rules on your email server.
- Forward all incoming emails from your support email to the Salesforce-generated email service address.
- This step ensures all customer emails are captured and processed by Salesforce.
Verifying Email Delivery and Case Creation
Test the setup to confirm that emails are being converted into cases:
- Send a test email to your support address.
- Check Salesforce to verify that a new case is created with the correct details.
- Ensure that attachments and other relevant information from the email are included in the case.
Advanced Salesforce Email to Case Configuration
After the basic setup, explore advanced configurations to maximize the efficiency and functionality of Salesforce Email to Case.
Customizing Case Creation Rules
Define rules that specify how cases are created from emails:
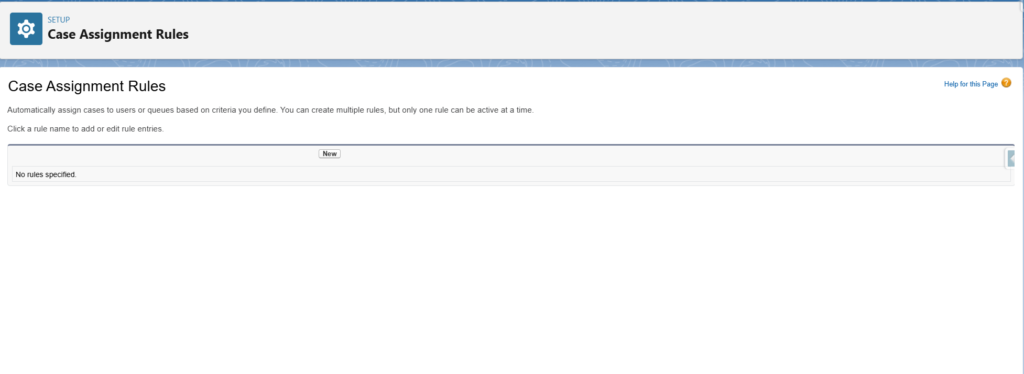
- Go to Setup, then Email-to-Case, and configure Case Assignment Rules.
- Create rules based on email content, sender information, or other criteria to route cases to the appropriate teams or agents.
Automating Case Assignment
Use assignment rules to automate case routing:
- Navigate to Setup, search for Assignment Rules, and create new rules for cases.
- Define criteria for assigning cases to specific agents or queues based on case details.
Email Templates and Auto-Responses
Enhance communication with customers using email templates and auto-responses:
- Create custom email templates for common responses.
- Set up auto-response rules to send automatic acknowledgments to customers when their email is received.
Setting Up Email to Case with Other Salesforce Features
Integrate Email to Case with other Salesforce features to enhance your support operations.
Using Salesforce Service Cloud
Integrate Email to Case with Service Cloud for a comprehensive support solution:
- Utilize tools like Omni-Channel Routing, Service Console, and Knowledge Base.
- These tools work seamlessly with Email to Case to improve case management and resolution times.
Integration with Knowledge Base
Leverage the Knowledge Base to assist support agents:
- Integrate Email to Case with Knowledge Base to suggest relevant articles based on case details.
- This helps agents resolve issues more efficiently by providing quick access to useful information.
Utilizing Salesforce Communities
Create self-service portals for customers using Salesforce Communities:
- Integrate Email to Case with Communities to allow customers to submit and track cases directly from the portal.
- This reduces the workload on support teams and empowers customers to find solutions independently.
Managing and Monitoring Email to Case
Effective management and monitoring are essential for optimal performance of Email to Case.
Tracking Email to Case Performance
Regularly monitor Email to Case performance to identify issues and opportunities:
- Use Salesforce dashboards and reports to track key metrics such as case volume and response times.
- These tools provide insights to help you make data-driven decisions.
Analyzing Case Metrics and Reports
Dive deeper into case metrics and reports:
- Analyze trends in case types, customer issues, and agent performance.
- Use this analysis to identify areas for improvement and implement strategies to enhance support processes.
Best Practices for Email to Case Management
Adopt best practices for managing Email to Case:
- Regularly train support agents to ensure they are familiar with the system.
- Maintain updated email templates and conduct periodic audits of case management processes.
- These practices help keep your support operations efficient and responsive.
Troubleshooting Common Issues in Email to Case Setup
Address common issues that may arise during the setup and operation of Email to Case.
Email Delivery Problems
If emails are not delivered to Salesforce, check the following:
- Ensure the forwarding rules on your email server are correctly configured.
- Verify that there are no filters blocking the emails.
- Confirm that the email service address in Salesforce is active and correctly set up.
Case Creation Failures
If cases are not created from emails, review these points:
- Check the email service settings and Apex class configuration.
- Ensure the Apex class is correctly processing incoming emails.
- Verify the Email-to-Case settings for any misconfigurations.
Troubleshooting Email Service Address
If the email service address is not working:
- Generate a new address and update the forwarding rules on your email server.
- Ensure the new address is correctly linked to the email service in Salesforce.
- Test the new address by sending test emails and verifying case creation.
Optimizing Email to Case for Better Efficiency
Implement advanced optimization techniques to enhance the efficiency of Email to Case.
Enhancing Email Routing
Improve email routing with advanced rules and workflows:
- Use Salesforce’s Omni-Channel Routing to dynamically assign cases based on agent availability and skill sets.
- This ensures that cases are handled by the most suitable agents, leading to faster resolutions.
Implementing Workflow Rules and Macros
Automate repetitive tasks with workflow rules and macros:
- Workflow rules can trigger actions such as sending notifications, updating case fields, and creating follow-up tasks.
- Macros allow agents to perform multiple actions with a single click, saving time and reducing errors.
Leveraging AI and Einstein Bots
Incorporate AI and Einstein Bots for enhanced Email to Case functionality. Checkout my recent ChatGPT article for more info on AI and Salesforce. Visit Salesforce’s official documentation here.
- Einstein Bots can handle simple customer inquiries, providing instant responses and freeing up agents for more complex issues.
- AI-powered insights can help predict case escalation and recommend proactive actions to prevent customer dissatisfaction.
Email to Case FAQ’s
Email to Case converts incoming emails into cases, while Web to Case converts web form submissions into cases. Both features automate case creation but differ in their input sources.
Yes, you can configure multiple email addresses for Email to Case. Each address can have its own email service and routing rules.
Some limitations include the maximum email size, the number of email addresses, and the complexity of custom processing rules. It’s essential to review Salesforce’s documentation for detailed limitations.
Ensure that the email service is configured to accept attachments. Verify that the Apex class handling the emails is correctly processing and attaching them to the cases.