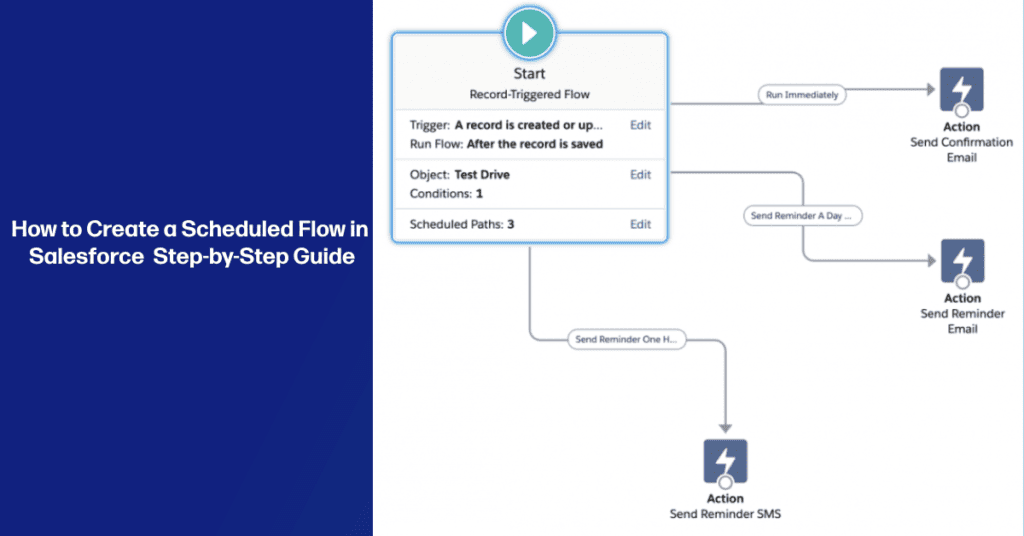
How To Create a Scheduled Flow in Salesforce
Discover the power of creating Scheduled Flows in Salesforce, an automation feature that allows you to save time and effort by automating tasks and processes at specific intervals. In this comprehensive step-by-step guide, we’ll walk you through the process of creating a Scheduled Flow in Salesforce.
Step 1: Define the Objective of the Scheduled Flow
Learn how to clearly define the objective of the Scheduled Flow you want to create and determine the desired schedule, whether it’s daily, weekly, or monthly. Achieve efficient automation by setting clear goals.
Step 2: Create a Custom Object (if needed)
Explore the process of creating a Custom Object in Salesforce to store data if your Scheduled Flow requires it. Establish a structured framework for housing the records generated by your flow.
Step 3: Access Flow Builder
Navigate the Salesforce Setup menu to find and access “Flow Builder,” the visual interface that simplifies the creation of flows. Discover the user-friendly environment where you’ll bring your Scheduled Flow to life.
Step 4: Create a New Flow
Follow the guided steps to create a new Scheduled Flow in Flow Builder. Select the “Scheduled-Triggered Flow” option to align with your automation requirements.

Step 5: Configure the Schedule
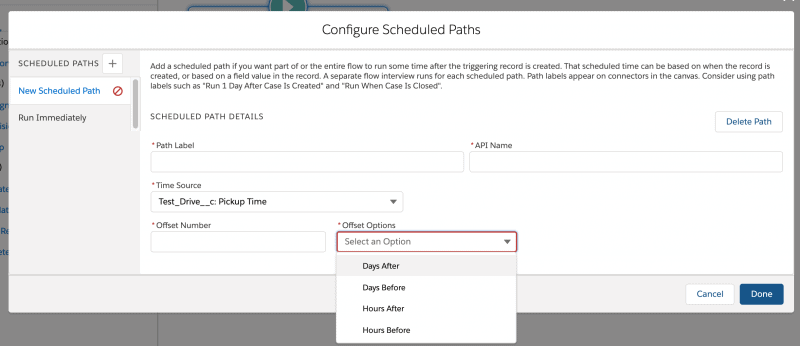
Discover how to configure the schedule for your flow within the intuitive Flow Builder canvas. Specify the Start Date, Start Time, and Frequency according to your desired automation schedule.

Step 6: Add Elements to the Scheduled Flow
Learn how to leverage the Flow Palette in Flow Builder to add elements that define the actions and logic of your Scheduled Flow. Drag and drop elements like “Get Records,” “Decision,” and “Assignment” to shape your flow.
Step 7: Configure Elements within the Scheduled Flow
Gain insights into configuring the properties of each element by double-clicking on them. Set criteria, conditions, or assignments based on your specific requirements, and connect the elements to create a seamless flow of actions.
Step 8: Test and Validate the Scheduled Flow
Ensure the smooth execution of your Scheduled Flow by conducting thorough testing. Simulate the flow’s performance using sample data or test records. Identify and resolve any errors or unexpected outcomes.
Step 9: Activate the Scheduled Flow
Once you’re confident in the functionality of your Scheduled Flow, activate it to make it operational. Activate the flow with a single click and witness the automation in action within your Salesforce org.
Step 10: Monitor and Refine your Scheduled Flow
Continuously monitor the execution of your Scheduled Flow and proactively address any data, error, or performance issues that arise. Refine the flow as needed to optimize efficiency and adapt to evolving scenarios.
Salesforce Flows Conclusion
Congratulations on successfully creating a Scheduled Flow in Salesforce! By following our step-by-step guide, you’ve gained the ability to automate tasks and processes according to your desired schedule, unlocking increased productivity and time savings. Leverage the power of Scheduled Flows to enhance your Salesforce automation capabilities and streamline your operations. Continually refine and explore additional features to maximize efficiency and drive business growth. If you want to learn more about Scheduled Flows in Salesforce, checkout their Trailhead lesson. If you’d like to read about real world examples checkout my other article Boosting Business Efficiency with Scheduled Flows in Salesforce.
Note: Customize the steps outlined in this guide to match your specific requirements. Thoroughly test and adhere to Salesforce best practices for optimal performance and results. If you haven’t done so yet connect with me on LinkedIn.
🙋 Salesforce Scheduled Flows FAQs
Scheduled flows run in Salesforce as the Automated Process user. This user is a system-level user specifically created for running automated processes, such as scheduled flows. When a scheduled flow is triggered, it executes with the permissions and access levels assigned to the Automated Process user, ensuring consistent and controlled execution of the flow.
In summary, Schedule Apex is used for executing custom code on a schedule, while Schedule Flow is used for automating declarative flows without the need for coding. The choice between the two depends on the complexity of the automation required and the level of customization needed for the process.
Scheduled Flows in Salesforce have limitations: execution limits, limited time granularity, linear control flow, no user interaction, no external calls support, and limited error handling. Consider these when choosing Scheduled Flows for automation.
- Define the Objective
- Create a Custom Object (if needed)
- Access Flow Builder
- Create a New Flow
- Configure the Schedule
- Add Elements to the Flow
- Configure Elements
- Test and Validate
- Activate the Flow
- Monitor and Refine
