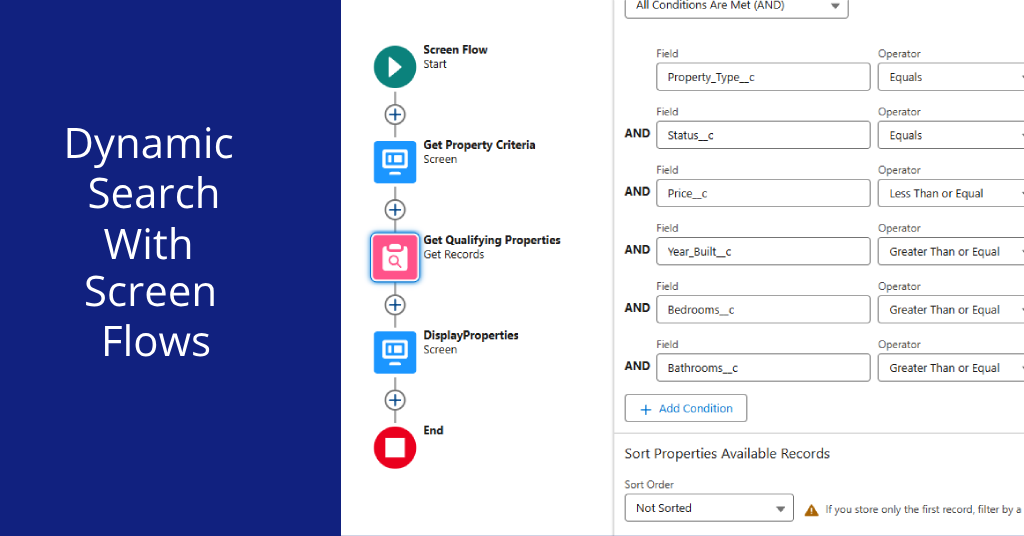
Searching for related records in Salesforce shouldn’t be a hassle! With the power of Dynamic Search with Screen Flow, you can create a dynamic search tool that makes filtering and finding data seamless and efficient. Whether you’re managing properties, opportunities, or custom objects, this tool empowers your team to input search criteria and instantly access relevant results—all without leaving the Account page.
In this step-by-step guide, we’ll show you how to create a dynamic search tool to filter related records, such as properties, opportunities, or other custom objects. This solution will save time, improve efficiency, and provide a seamless experience for your Salesforce users.
Dynamic Search with Screen Flow
The first step to creating a dynamic search tool is setting up your Screen Flow. This allows users to input custom criteria and view filtered results.
Create A New Screen Flow
- Navigate to Setup > Flows and click New Flow.
- Select Screen Flow and choose the Freeform Canvas layout.
Configuring the Input Screen for Search Criteria
The Input Screen is where users enter their search parameters, such as property type, price range, and number of bedrooms. This is the starting point for customizing your flow.
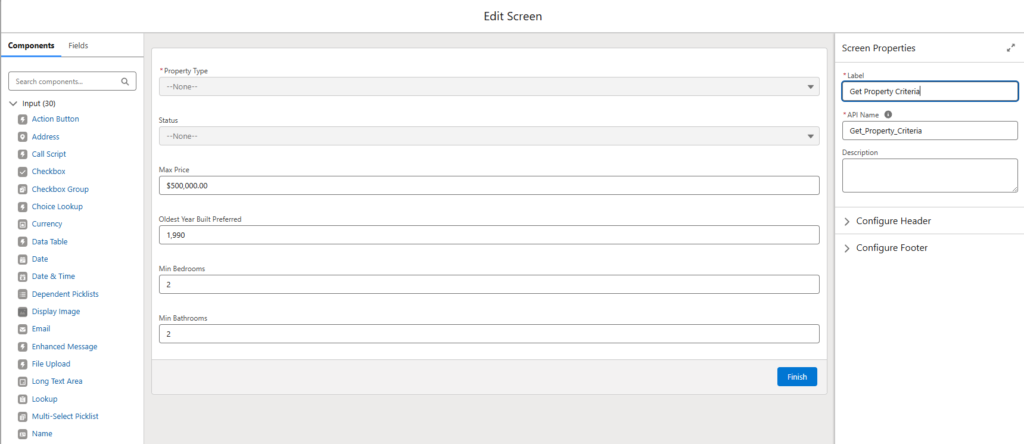
- Drag a Screen Element onto the canvas.
- Configure the screen for user input:
- Use the “Configure Header” and “Configure Footer” sections to add helpful titles and navigation buttons.
- Add the following fields:
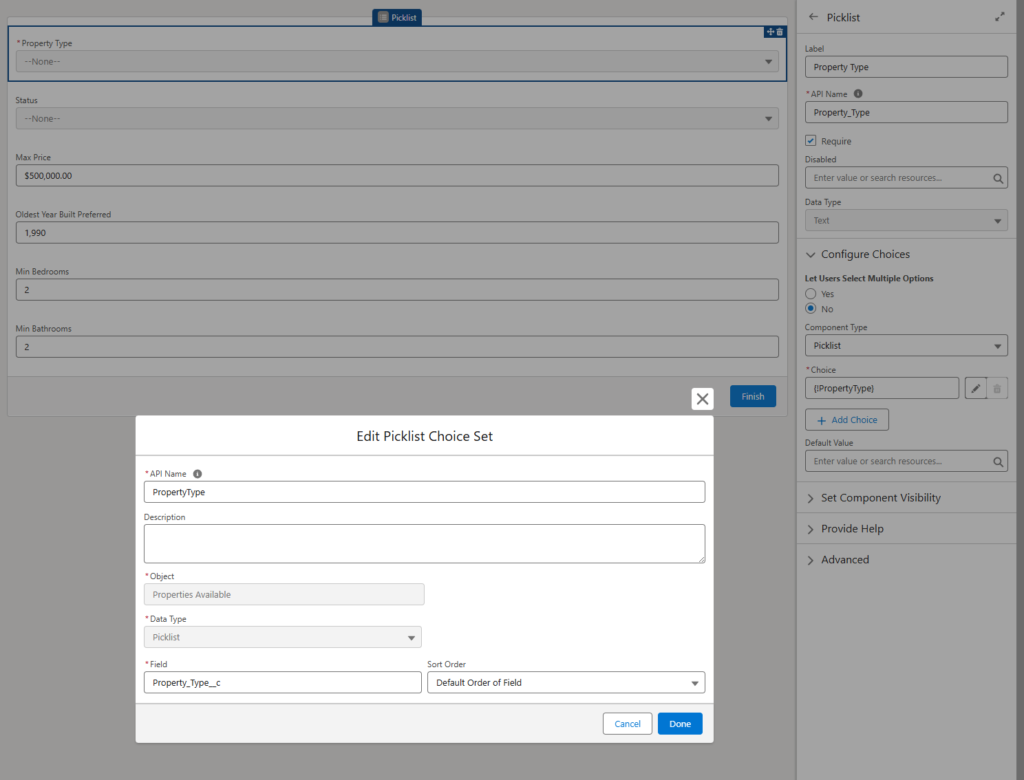
- Property Type: Allows users to select values like Condo, Single Family Home, etc.
- Status: Filters by property status such as Active or Sold.
- Max Price: Sets the upper limit for property prices.
- Min Bedrooms: Filters properties with at least the specified number of bedrooms.
- Min Bathrooms: Filters properties with at least the specified number of bathrooms.
- Oldest Year Built Preferred: Filters properties built on or after the specified year.
- Best Practices for Input Fields
- Arrange fields logically to ensure a clean and intuitive user interface.
- Use field labels and tooltips to guide users and avoid confusion.
- Preview your screen to confirm usability before proceeding.
Below is an example of the Input Screen configuration. Notice the logical arrangement of fields and clear labels for each input.
Get Matching Properties
Now that you’ve set up the input screen, the next step is to fetch the relevant properties based on the user’s criteria. This is achieved by using the Get Records Element to query the Properties Available object.
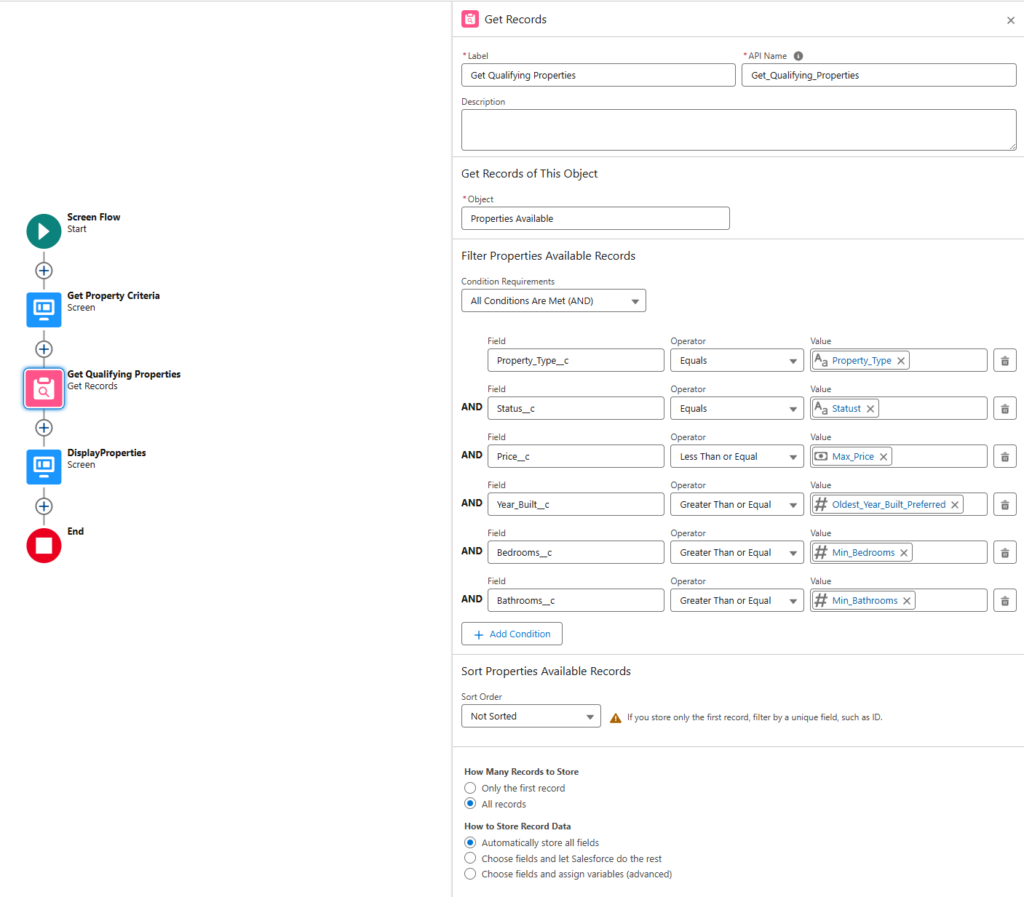
Below is an example configuration of the Get Records Element, showing how conditions are set to query the Properties Available object.
How to Configure the Get Records Element
- Drag a Get Records Element onto the canvas after the input screen.
- Configure it with the following details:
- Object: Properties Available
- Condition Requirements: Set conditions to filter records based on user input. Here are some examples:
- Price:
Price <= {!MaxPrice} - Bedrooms:
Bedrooms >= {!MinBedrooms} - Bathrooms:
Bathrooms >= {!MinBathrooms} - Year Built:
Year_Built >= {!OldestYearBuiltPreferred} - Status:
{!Status}(only if selected by the user) - Property Type:
{!PropertyType}(only if selected by the user)
- Price:
- Sort Properties:
- Sort by fields that make sense for your use case (e.g., Price in ascending order).
- For example, sort by the most relevant criteria to prioritize results.
- How Many Records to Store:
- Choose All Records or Only the First Record depending on your requirements. For this scenario, select All Records to display all properties that meet the criteria.
Dynamic Search Best Practices
- Use AND Conditions to combine multiple filters for more specific results.
- Double-check field mappings to ensure user input aligns with the fields in the Properties Available object.
- Test your filters with sample data to ensure they return accurate results.
Displaying the Search Results
After configuring the flow to fetch relevant properties, the next step is to display the results in a clear and user-friendly format. Using a Data Table component makes it easy for users to view and analyze the matching records.
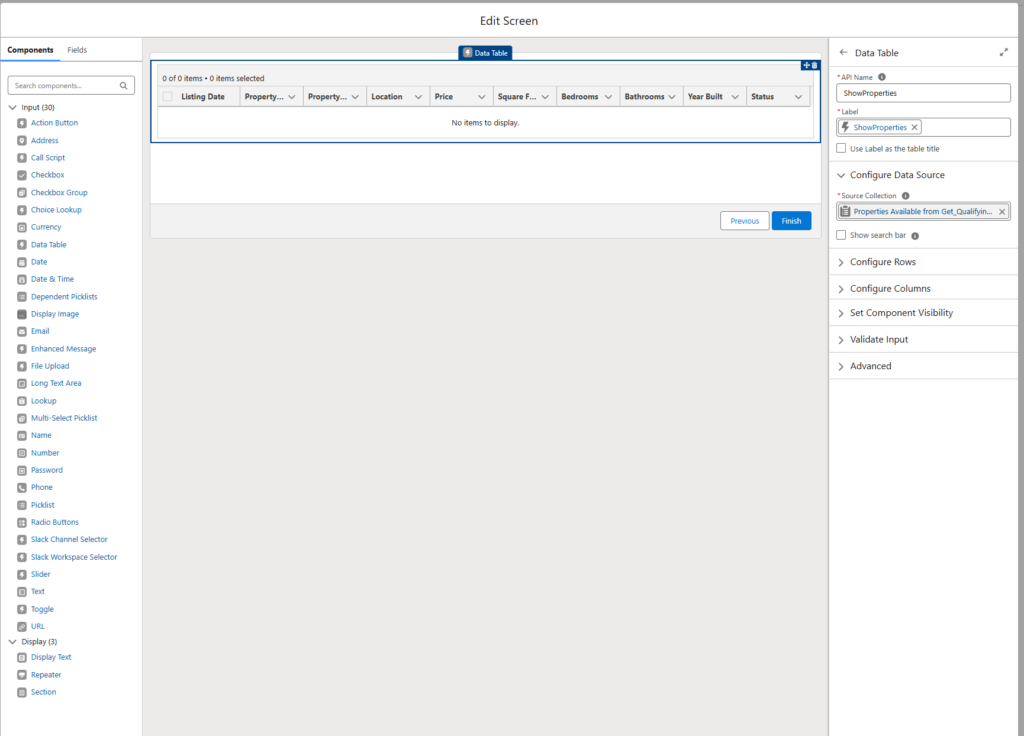
How to Configure the Results Screen
- Add a Screen Element:
- Drag a new Screen Element onto the canvas after the Get Records Element.
- Use the Data Table Component:
- Drag and drop a Data Table component onto the screen.
- Configure the table to display the relevant fields from the Properties Available object. Suggested fields include:
- Property Name: The name of the property.
- Price: The property’s list price.
- Bedrooms: The number of bedrooms.
- Bathrooms: The number of bathrooms.
- Location: The property’s location or address.
- Status: The current status of the property (e.g., Active, Sold).
- Set the Data Source:
- Use the results from the Get Records Element as the data source for the table.
- Ensure the data source is linked correctly to dynamically display matching properties.
- Add Navigation Buttons:
- Include buttons like Previous and Finish for users to navigate:
- Previous: Allows users to go back and adjust their search criteria.
- Finish: Lets users complete and exit the flow.
- Include buttons like Previous and Finish for users to navigate:
Dynamic Search Best Practices for Displaying Results
- Sort Columns for Clarity: Ensure fields like Price or Status are sortable for better usability.
- Limit the Number of Records Displayed: If necessary, limit the number of rows in the Data Table to avoid overwhelming users.
- Use Filters: Allow users to further refine the results if needed (optional advanced step).
Adding the Dynamic Search Flow to the Account Page
To make the search tool easily accessible, you’ll need to add the Screen Flow as a button on the Account page. This allows users to launch the search flow directly from the record they’re working on.
Steps to Add the Button

- Create a Quick Action:
- Navigate to Setup > Object Manager > Account > Buttons, Links, and Actions.
- Create a new Action and select Flow as the action type.
- Choose the Screen Flow you created and name the action (e.g., “Find Available Property”).
- Save the action for later use.
- Add the Action to the Account Page Layout:
- Go to Page Layouts for the Account object.
- Drag the new Quick Action to an appropriate section of the layout, such as the Related List Quick Actions area.
- Add the Button to the Lightning Page:
- Use the Lightning App Builder to add the button to the Account Lightning Page.
- Place the button in an intuitive spot, such as near the top of the page or in a prominent section.
Testing the Dynamic Search Tool
After configuring the button, it’s important to test the entire flow to ensure it works as expected.
Steps to Test:
- Navigate to an Account:
- Open any Account record in Salesforce where you expect to use the tool.
- Click the “Find Available Property” Button:
- This will launch the Screen Flow you configured.
- Enter Search Criteria:
- Input values such as property type, max price, and minimum bedrooms to filter properties.
- View the Results:
- Verify that the flow displays matching properties in a clean data table format.
Pro Tips:
- Test the flow with different sets of data to ensure all scenarios work as expected (Try using fault paths)
- Adjust the button placement based on user feedback for better visibility and usability.
- Use descriptive names for your actions and flows to make maintenance easier in the future.
Benefits of the Dynamic Search tool
- Efficient Searching: Save time by finding relevant records directly from the Account page.
- Customizable: Easily adapt the flow for other use cases.
- User-Friendly: Simplifies the search process for end users without complex queries or navigation.
Closing Thoughts on Dynamic Search with Screen Flow
Salesforce Screen Flows are a powerful tool for creating dynamic, user-friendly solutions that streamline processes and enhance productivity. By building a dynamic search tool, you empower your users to filter and find relevant records with ease, saving time and improving decision-making.
Whether you’re managing properties, opportunities, or custom objects, this tool can be tailored to fit your unique business needs, making it a game-changer for both productivity and user experience. If you want to learn more about screen flows checkout the trailhead lesson.
Dynamic Search Tool FAQs
Ensure the search criteria are broad enough to match at least one record.
Verify that the Properties Available object contains data matching the filters.
Yes! Replace the Properties Available object with any other object, like Opportunities or Contracts, and adjust the filters accordingly.
Add validation rules to ensure users input logical values (e.g., Min Price < Max Price).
Include additional criteria like location, square footage, or custom fields.
